
1.0 Introduction
Modern customers have a very short attention span. In other words, if they are hovering over an eCommerce website, the admin has very less time to provide them with the information and offers at the same time. Even, many kinds of information help the customers to understand if the product is a perfect fit for their needs or not.
Following the same, we have designed the Opencart Product label extension for the Opencart eCommerce merchants. Using the extension, the admins can add responsive stickers on their shopfronts. Moreover, the admins can even upload the stickers and set the dimensions and sticker position at their convenience.
Likewise, if you are willing to make your customers aware of sales, offers, delivery time, and other pieces of information. We have got you covered with Knowband’s Product Label Extension for Opencart. On top of that, the extension comes with tons of richly loaded features to make sure your piece of mind. Let’s find out some of the most highlighted features offered by the Opencart product sticker plugin.
1.1 Major Highlighted Features Offered by Knowband’s Product Label Extension:
The Opencart product sticker plugin is empowered by tons of incredible features. Not only the plugin is configurable from the back end but also provides high-quality pre-loaded stickers.
We have tried to cover up some of the most sounding features of the Opencart product sticker module.
- The admins can boost their revenue by showing the offer discounts on products.
- The Opencart store admins can choose the pages where they want to show the product stickers.
- For example, the store administrators can choose the options from the product page, product listing page, search page, home page, and much more.
- The Opencart admins can include or exclude specific products for the sticker appearance.
- With the help of the Opencart Product Sticker module, the store admins can include the Opencart store categories where they want to show the responsive stickers.
- Along with pre-available stickers, the admins can also upload the stickers of their own will in the module and make them appear within no time on the shopfront.
- The Opencart Product Label plugin provides the option to show the stickers based on the products’ available stock conditions.
- Create as many labels as you want within clicks.
- The Opencart store admins can manage the sticker positions on the product images right from the module backend.
- Moreover, the admins can choose the start date and end date for particular stickers.
- The admins get an option for choosing between all products, specific products, and special categories for the sticker appearance.
2.0 Installation Guide
The installation of the Opencart product label module is pretty easy. You can simply install the module by just following the below-mentioned steps.
After you will proceed with the order of Knowband OpenCart product label extension, you will get the following files at your end.:
- Zipped File containing the source code of the OpenCart product label extension.
- User Manual of OpenCart product label extension.
Follow the steps below to install the OpenCart Product Label Extension in the OpenCart store:
- For the first step, Unzip the zipped file (you will find the same in my account>>downloads). You’ll get the folders as shown in the image below:

- Copy all the files and folders of the zip file in the Root Directory of OpenCart setup via FTP manager.
- The Opencart product label module installation is done and the module is ready to configure now.
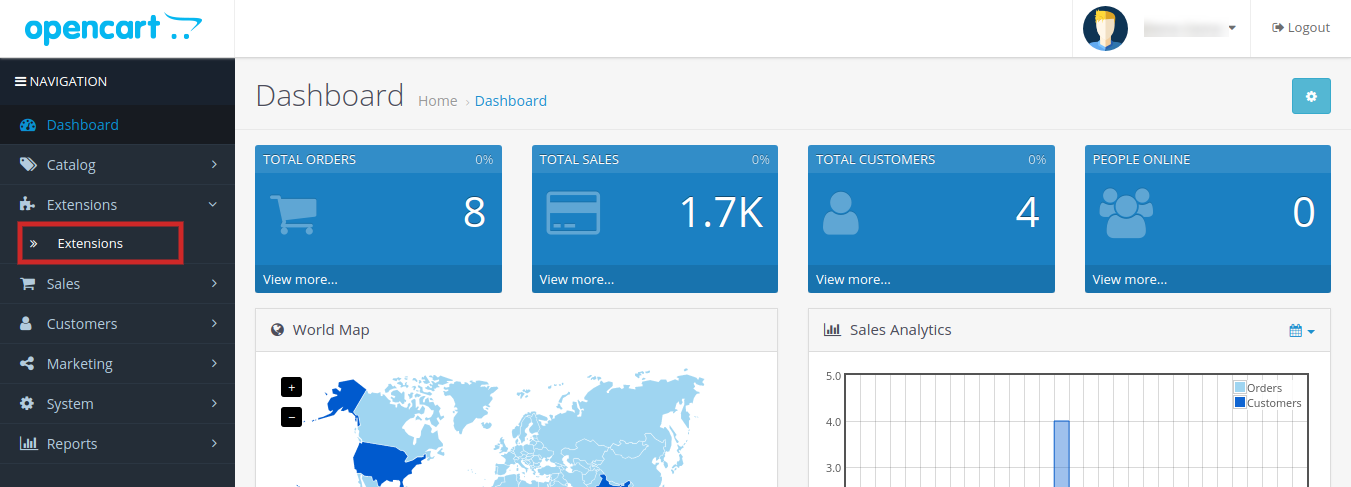
Go to Admin -> Main Menu -> Extensions as shown in the image below:
- Choose the product label by Knowband extension from the list of extensions and click on the Edit button.
3.0 Admin Interface of OpenCart Product Label/Sticker Extension:
The Opencart product sticker module comes with an easy-to-manage admin dashboard. The admins can manage every ounce of their extension within just a few clicks. The control panel for all the incredible features is managed in apple-pie order to deliver the piece of mind to the store admins.
Let’s discuss the admin panel configuration of Opencart Product Label Extension one by one.
3.1 General Setting:
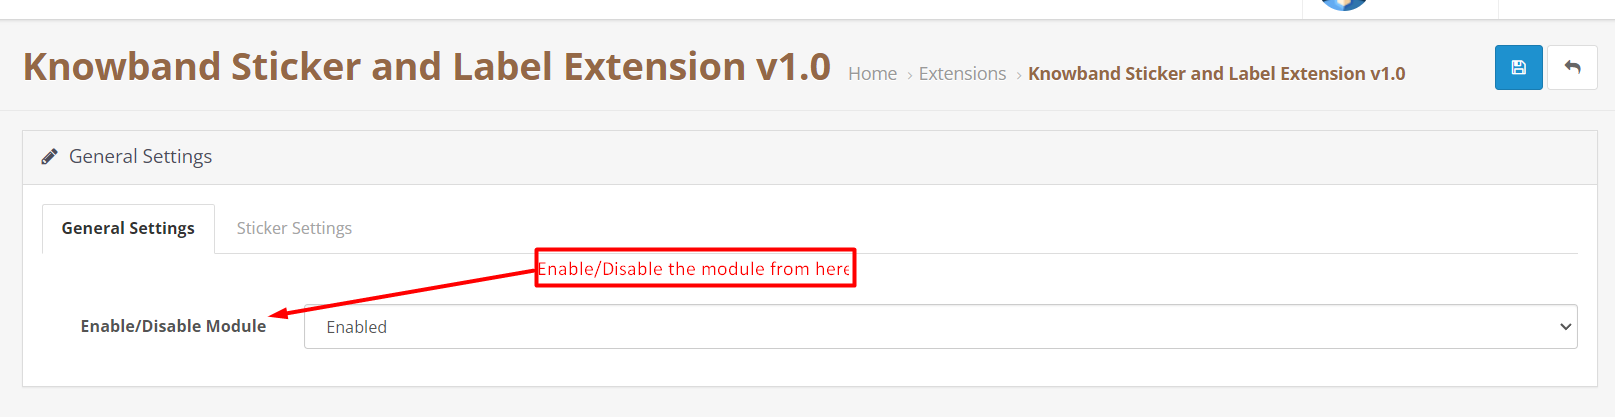
Under the General setting tab, we have provided an option for enabling/disabling the module.
Enable/Disable:
The admins can enable/disable the extension with the help of the following button.
3.2 Sticker Setting:

In the following tab of the Opencart Product Label plugin, we have provided options for showing all the added stickers. The admins can perform basic operations for stickers under the sticker setting tab.
Search Sticker Button:
You can search the sticker by sticker ID, Sticker Name, or by enable/disable condition in the following section.
Delete Sticker:
By the following option, the admins can remove the sticker permanently.
Edit Label:
The following option is for managing the sticker configuration. By clicking the following option, the admins will be redirected to the sticker setting page.
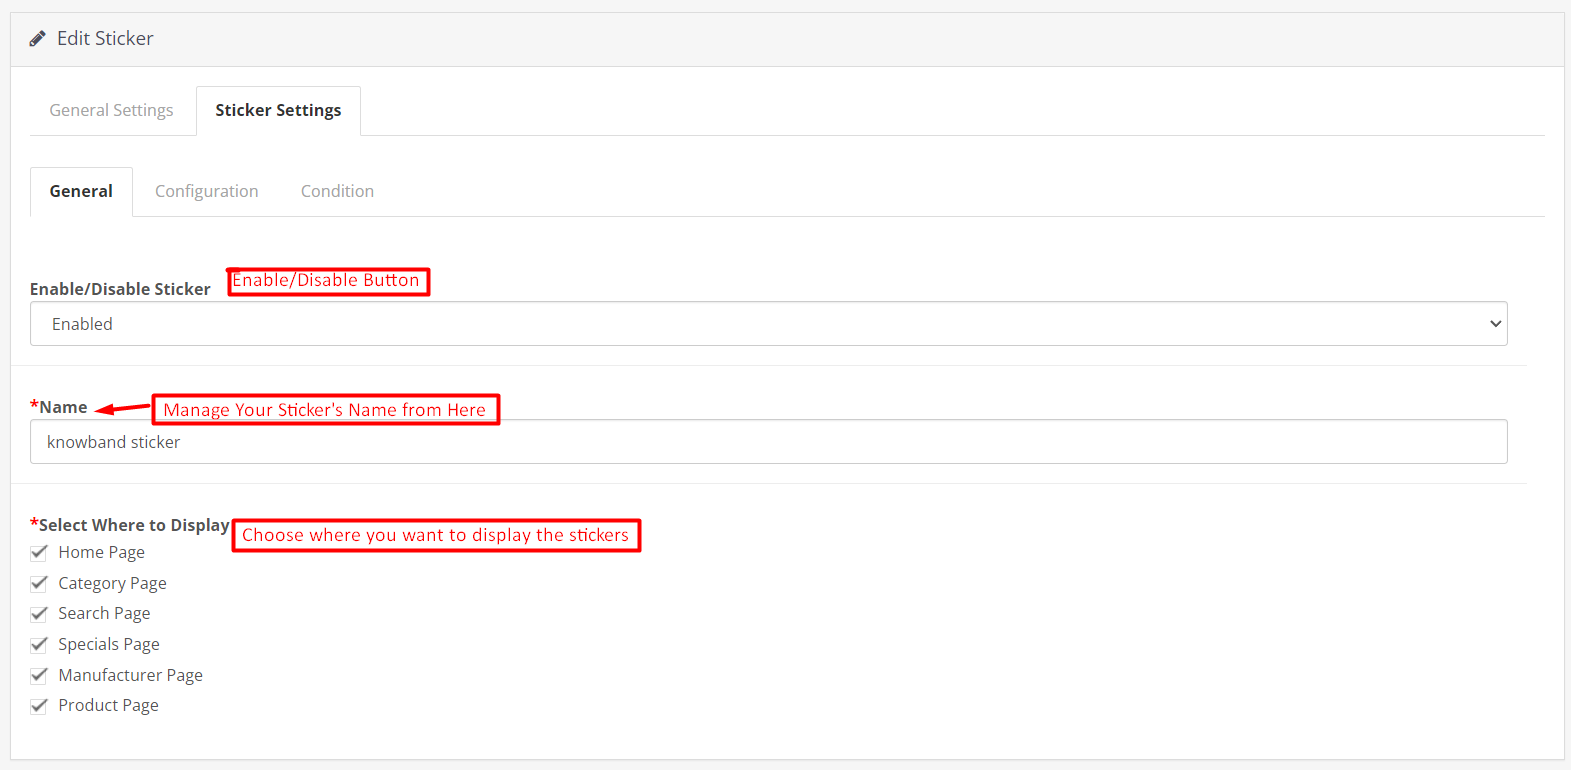
3.2.1 Sticker Setting: General
In the following tab, we have covered all the general settings for the Opencart Product Label Extension.
Enable/Disable Sticker:
The admin can choose the sticker appearance status from this button by simply choosing to enable/disable the button.
Name:
In the following text field, the Opencart store retailers can assign the name to a sticker.
Select Where to Display:
This particular section is added to provide the options of choosing the sticker appearance place. The admins can simply check the boxes where they want to show the stickers from the general setting tab.
For example, if you have selected the option product page and home page from this section. The added sticker will only appear on the home page and the product pages on the website’s front end.
3.2.2 Edit Sticker: Configuration:
Opencart Product Label Extension’s edit sticker tab allows the store admins to configure the physical appearance of the product label.
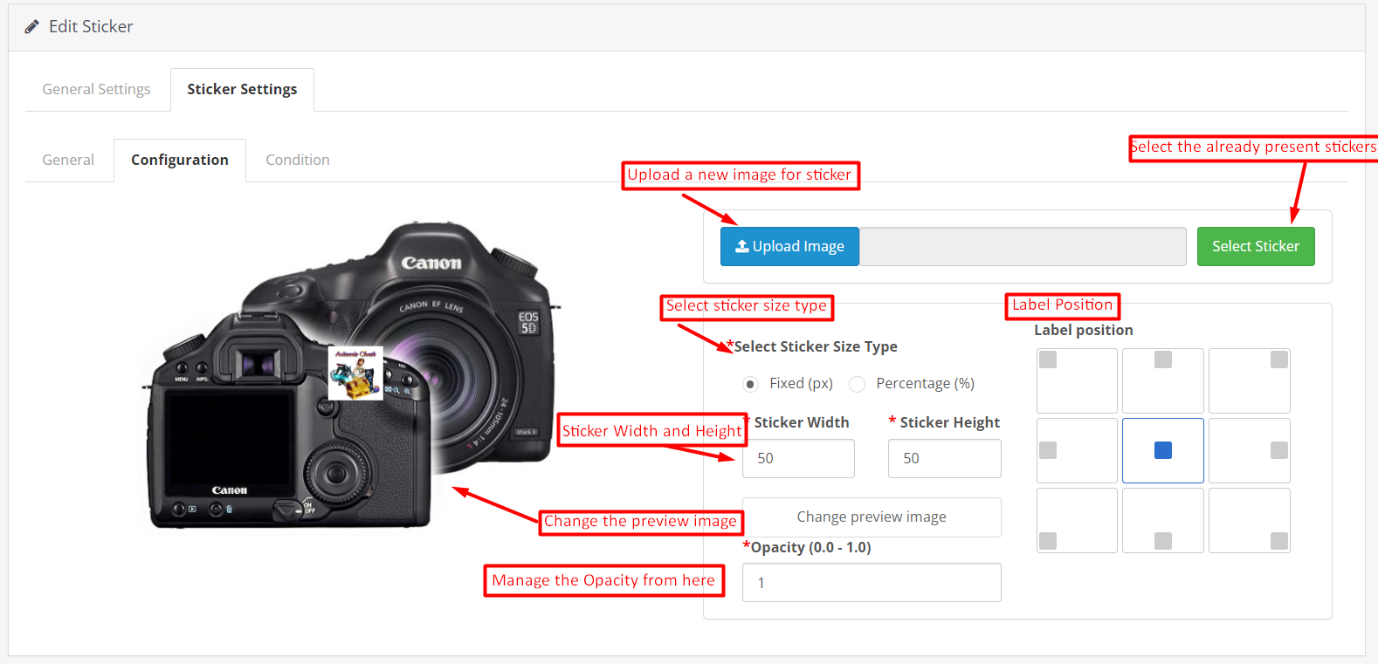
Select Sticker:
We provide various pre-loaded stickers along with the Product sticker module plugin for Opencart. By hitting the following button you can simply choose from the already available stickers. Apart from it, the stickers you will add from the module will also appear in the following section.
Upload Sticker:
If you want to upload a new sticker from your system, you can simply choose the upload sticker button.
Select Sticker Size Type:
In the following button, we have provided 2 options. If you want to manage the size of the sticker based on fixed (px.) you can click on the radio button.
Moreover, if you want to configure the sticker size based on percentage, we also provide the option for percentage.
Height and Width of Sticker:
By the following button, you can manage the height and width of your product label. Moreover, you can also see a live preview of the sticker appearance along with the size change. Maximum height and width for sticker should be mentioned for both cases i.e. 300px for fixed size and 100% for percentage.
Change the Preview Image:
With the following button, the admins can choose a new preview image for checking the appearance of the product labels.
Opacity:
In the following option, you can choose the opacity of the sticker.
3.2.3 Edit Sticker: Condition:
The condition tab in the sticker configuration tab is for managing the condition of stickers to appear on the front end.
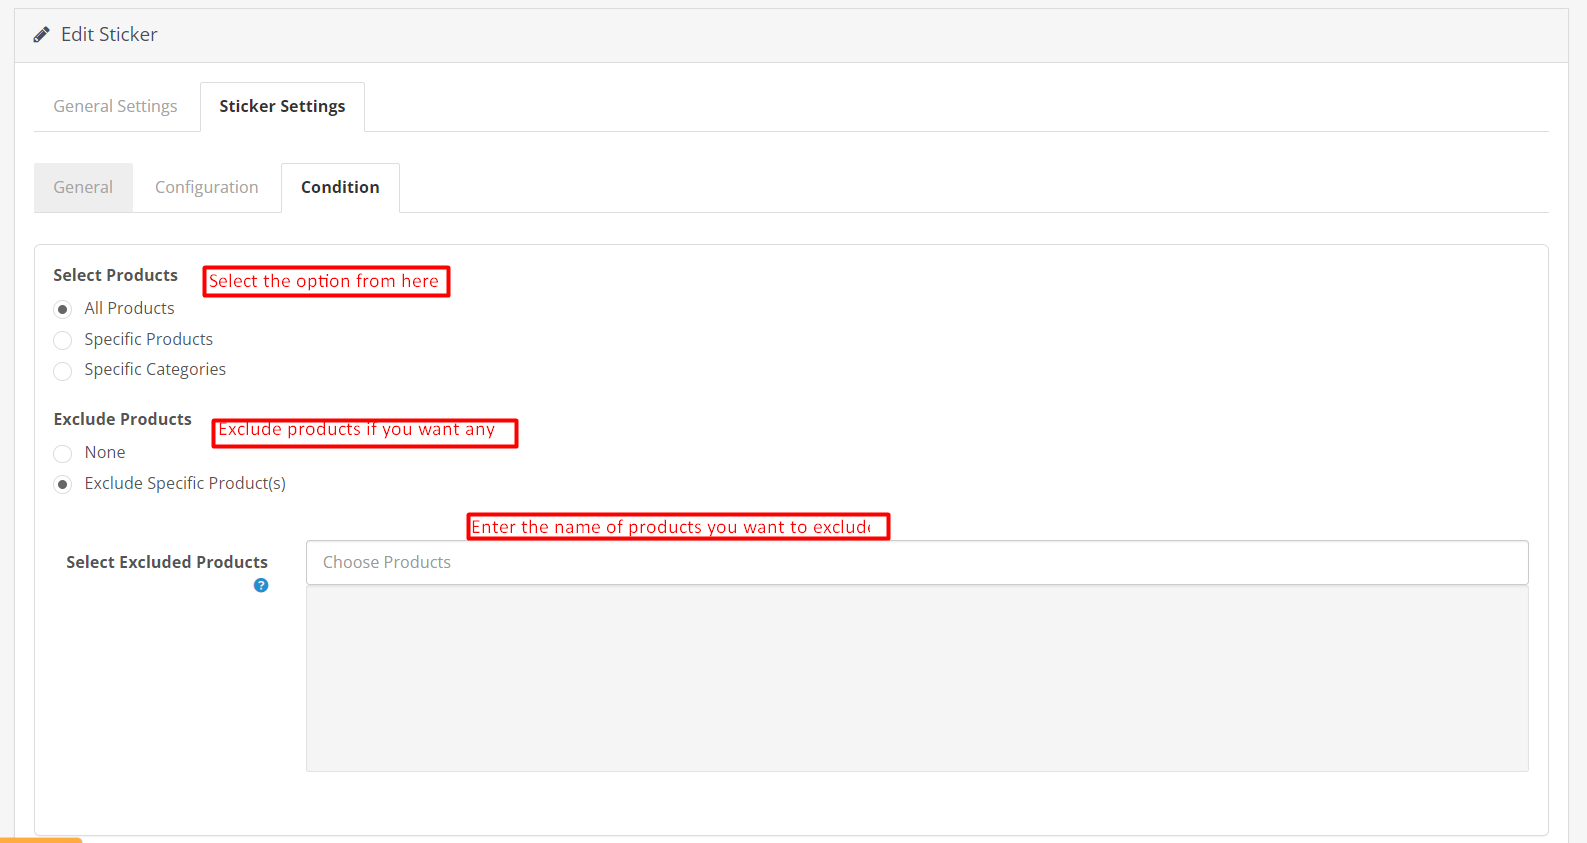
Select Products:
In the following button, the admins can choose the products where the sticker needs to appear.
Exclude Products:
If you do not want to exclude any product from the above-selected condition, you can go with the none option.
However, if you are planning to hide any specific product from the above-selected product group. You can simply choose the option to exclude products as shown in the image.
Select Excluded Products:
For excluding any product all you need to do is to enter the name of the product in the following text box field.
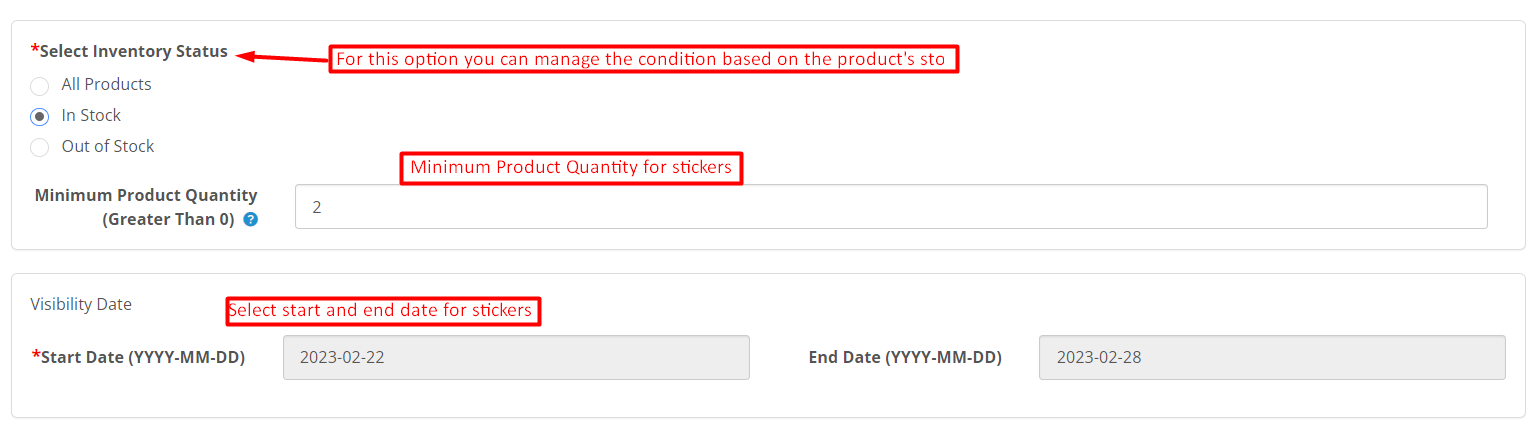
Select Inventory Status:
This particular section allows the admins to choose the sticker appearance based on the inventory status of the products.
All Products:
If you select this particular option, the sticker will appear for all the products.
In Stock:
If you select this option, the label will only appear for the in-stock products. Moreover, you can also add the minimum product quantity which needs to be considered for stickers.
Out of Stock:
By selecting the following option, the admins can show the product label for the out-of-stock products only.
Visibility Date:
Knowband’s Opencart Product Label Extension provides the following option for selecting the start and end date for the sticker.
You can simply pick any starting date and visibility end date for the sticker.
4.0 Front End of Opencart Product Label Plugin:
After making the changes as per convenience and saving the data from the module back-end. The Opencart store admins can check the preview of the made changes within no time. On top of that, the Opencart Product Sticker Extension allows the admins to show off high-quality stickers on their shopfronts. Below are some samples of the product sticker extension’s front end.
